Wednesday, April 17, 2019

The Burnout Build: F-19 Stealth Fighter, Italeri, 1/72

Every now and then (more so than not) a modeler will hit a wall with a current project. Either a problem has come up that requires some though, or that there has been enough frustration that one just needs to step away for a while. For me, it's been a mix of the two. That Revell Typhoon has been pretty frustrating lately and I just need to step away for a bit. Momentum will slow down and the worst thing to do is to step away completely as it could be a while before you'd want to go back to the bench. That's why I maintain a small stock of easy to build, cheap kits. I call it my Burnout Pile. It'll be a simple build, done any way you want, simple assembly or paint scheme (I tend to pick up cheap Matchbox or Airfix kits for $1-3 when I can find them). This one is a Italeri/Testor's F-19 Stealth Fighter from the 80's, before everyone had heard rumors of a stealth plane, but not much else:


I picked this up for a grand total of $1! Cheap cheap! I had this kit back when I was a kid and I enjoyed building it. It's only got three sprues (two black, one clear) and doesn't have an awful amount of detail, but my memory of it was that it was a quick and easy build.


This is actually one of my favorite boxes - the box art in the back show the completed model, along with some "facts" - I remember totally geeking out when I first saw this. The kit was in its original shrinkwrap, and opening the box up transported me back to 1991. Nicely packed, instructions and decals at the bottom. The bubble canopy had broken off the sprue, but I never liked it anyway and will opt for the smaller, more sinister framed canopy. I started off with a quick brush paint job, brushing the equivalent of dark gull gray on the cockpit details.


Tupolev Tu-22 Blinder, Esci (Italeri boxing), 1/72

It's been a while since I've posted, as I've been very unhappy with photo hosting sites lately. Ever since Picasa went away, it's been frustrating trying to upload images.

Anyway, hopefully, with Google Photos, this will work out.


Years ago, I desperately wanted a Tu-22, but could never afford one. When it went out of production, it went for an eye-watering $120 on eBay, and I was able to snag some from an estate sale for $20. Revell also reissued this a few years back, with some very colorful schemes for the Egyptian and Iraqi Air Forces. This particular one is the Iraqi example.


Several built examples show this as two-tone brown and tan, but right before I built this, a I found an image that it used gray and green, which actually looked better.


The most distinct omission on this kit is that the fuselage is too short by almost 4cm, and I believe the nose landing gear would need to be relocated as a result of the added length. I started correcting the issue but later abandoned it when I decided it looked good to me in the first place. This was during a phase when I had to have everything perfect, and I was absolutely miserable. One day, I took it out of the box, realized I was wasting my time agonizing over it, and finished it anyway. It looks like a Blinder with or without the plug, and it never bothered me before I heard about it anyway.

Paints used were a Tamiya light blue for the undersides, medium grey and olive green for the uppers. I opted to close the bomb bay as I liked the sleek likes of the aircraft.


I might do another one with the fuselage plug, but Trumpeter's coming out with one and I'll probably hold out for that one, as they've done pretty well with their bombers. Alternatively there's the Modelsvit kit. I'll probably pick whichever's cheaper.


The aircraft is massive - about 60cm - so I'm not too sorry about not plugging it, as I was living in an apartment at the time, so space was a premium anyway. So there it is - the Tu-22 Blinder. Looks good to me! The cool paint scheme, giant size and menacing looks (especially from the front) makes this one of my favorite models. Sorry about the grainy images - these were taken with an old camera. I might come about and redo the photos again at some point.

(The wings might look off but I promise you they're symmetrical - bad camera angle)


Wednesday, April 29, 2015

Aero Vodochody L-39 Albatross, Eduard, 1/72

So my coworker John (not his real name) has had some bad luck with trying to build an L-39 and has resorted to getting me to build it for him for a fee. I can't really price the time and labor on this, so I said I'd build it for him as long as he'd pray for our adoption process. So after some discussion, he showed up at my desk one day with this:


The Eduard kit has been around for a few years and is the definitive L-39 in 1/72, and comes in various boxings. The Weekend Edition is the cheapest, with the basic kit and decals, no photoetch or resin bits. Not bad for $15 on Amazon. 

Anyway John (well okay it's his real name) had occasionally asked me for tips on model building, so since I'm building this for him I'll do a step-by-step along with some techniques and some information on tools (listen up John!)

First things first - check what you need for paints. Paint colors vary widely, and in my experience the only colors that are consistent across the brands are black and white. Look at the color callouts on the instruction sheet. Sometimes you have to go match and research the colors. In this case, the color callouts use Gunze Sangyo paints, which I don't have, so I'll be matching them with Tamiya or Model master paints. You can see that I've started to scribble all over the instruction sheets.


The next thing you'll need to do is to wash the molds. Limited run kits tend to have mold release on them (some of them look like there's oil on them!), and although Eduard tends to be on the mass production side I thought the parts looked a little slick, so a quick soak for 10 minutes in warm (not hot) soapy water and a rinse should do the trick:


Next, you'll need tools. Every modeler has a basic set of tools, sometimes multiples for specific jobs. To start, you have your sprue cutters. I love my trusty Xuron cutters, and I also have UMM-USA's sprue cutters for cutting those delicate parts. You can see from the closeup on the UMM that they're designed to reach into tight spaces.

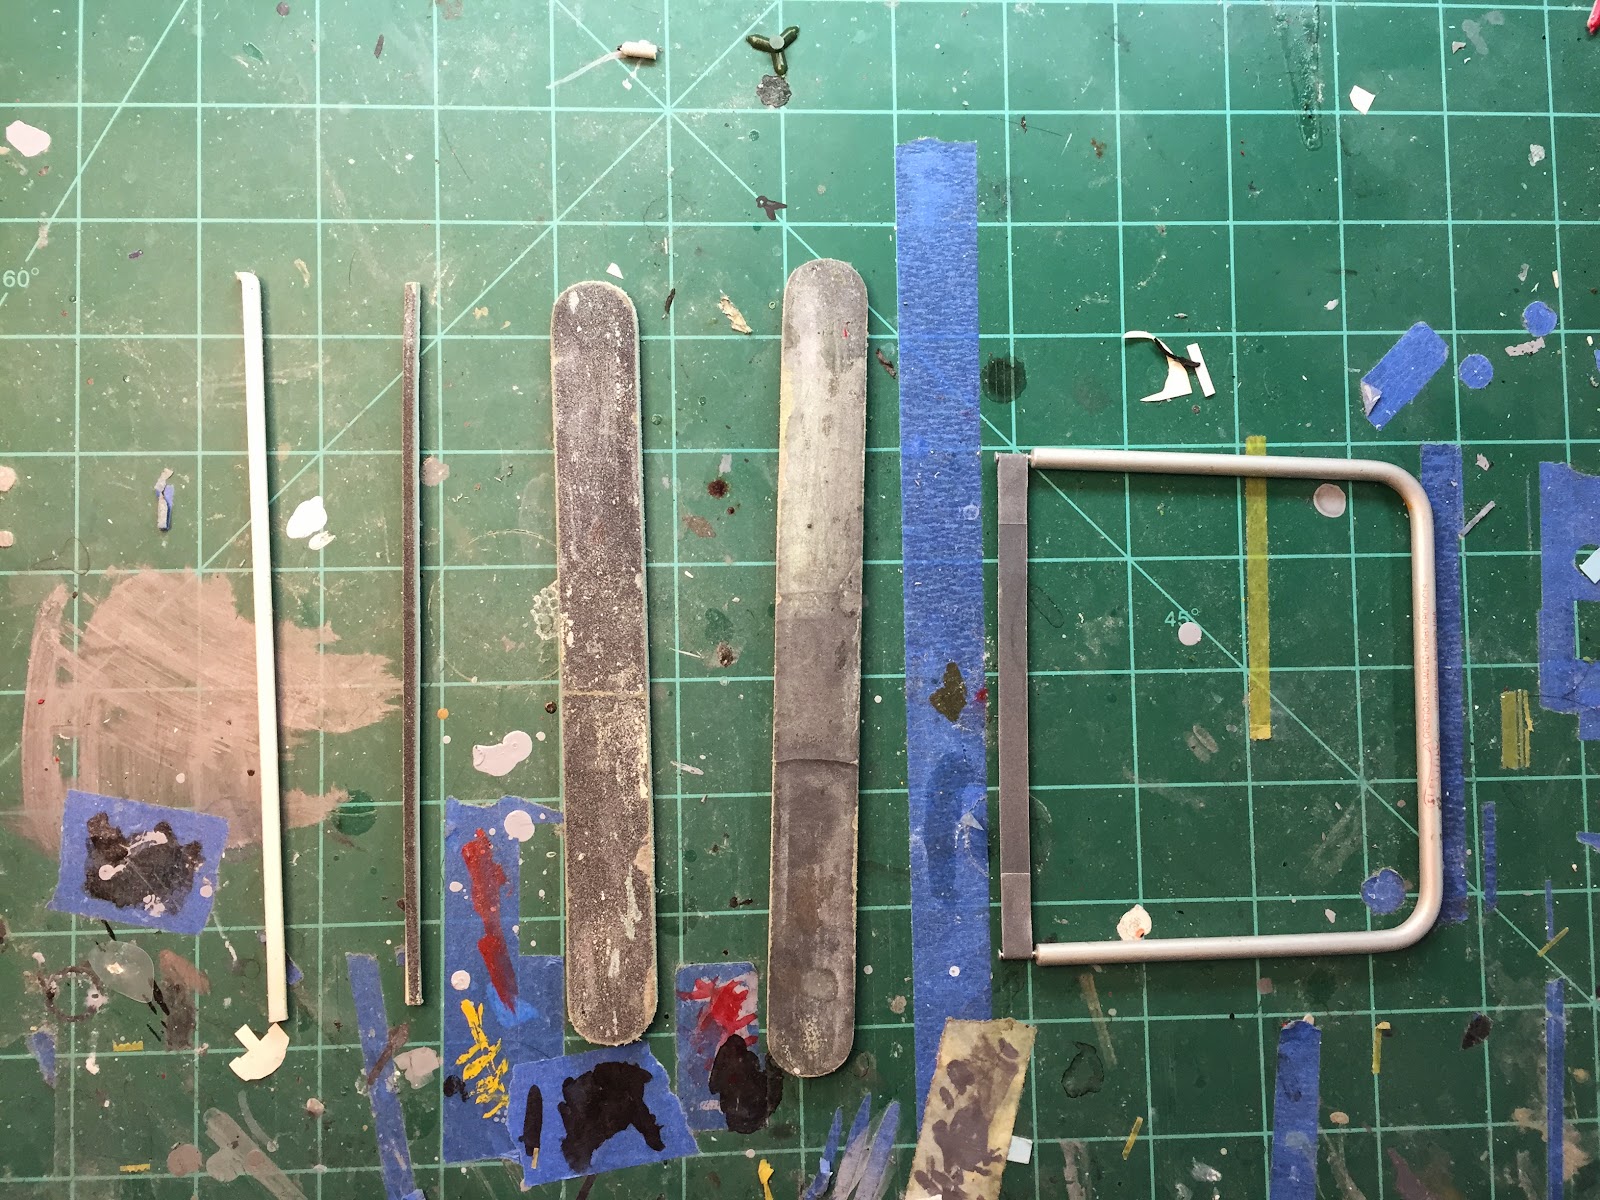
Next, you'll need some sanding tools. Most people have a basic emery board. I have, from left to right: sanding sticks (basically thin emery boards), a rough and smooth emery board, and a more specialized tool, a Flex-I-File, which is a sanding strip designed to sand on rounded surfaces. You don't really need a Flex-I-File, but it is convenient.


Next, glue. Most people can get away with the basic Testor's model glue. However, using specialized glues can put a model together with a lot less fuss (as long as you know what you're doing and how they're used). From left to right, Tamiya liquid cement (based on methyl-ethyl-ketone or MEK) works best for areas where you need to weld rather than glue. This stuff is pretty hot and will melt and fuse the joining surfaces together. Great for fuselage halves. In the middle is Faller Super Expert, which I've been using for years. It's similar to Testor's as it's your regular glue type, but hotter than Testor's, will go through paint, and comes with a needle applicator. Perfect for giant parts like wing joins and small parts as well. To the right is cyanoacrylate glue, aka Super Glue, which would be good for small parts that have very little surface area to attach, landing gear parts, resin and photoetch. Finally, the white tube is a recent find - jeweler's glue. It's clear, has a hypo needle applicator, perfect for clear parts!


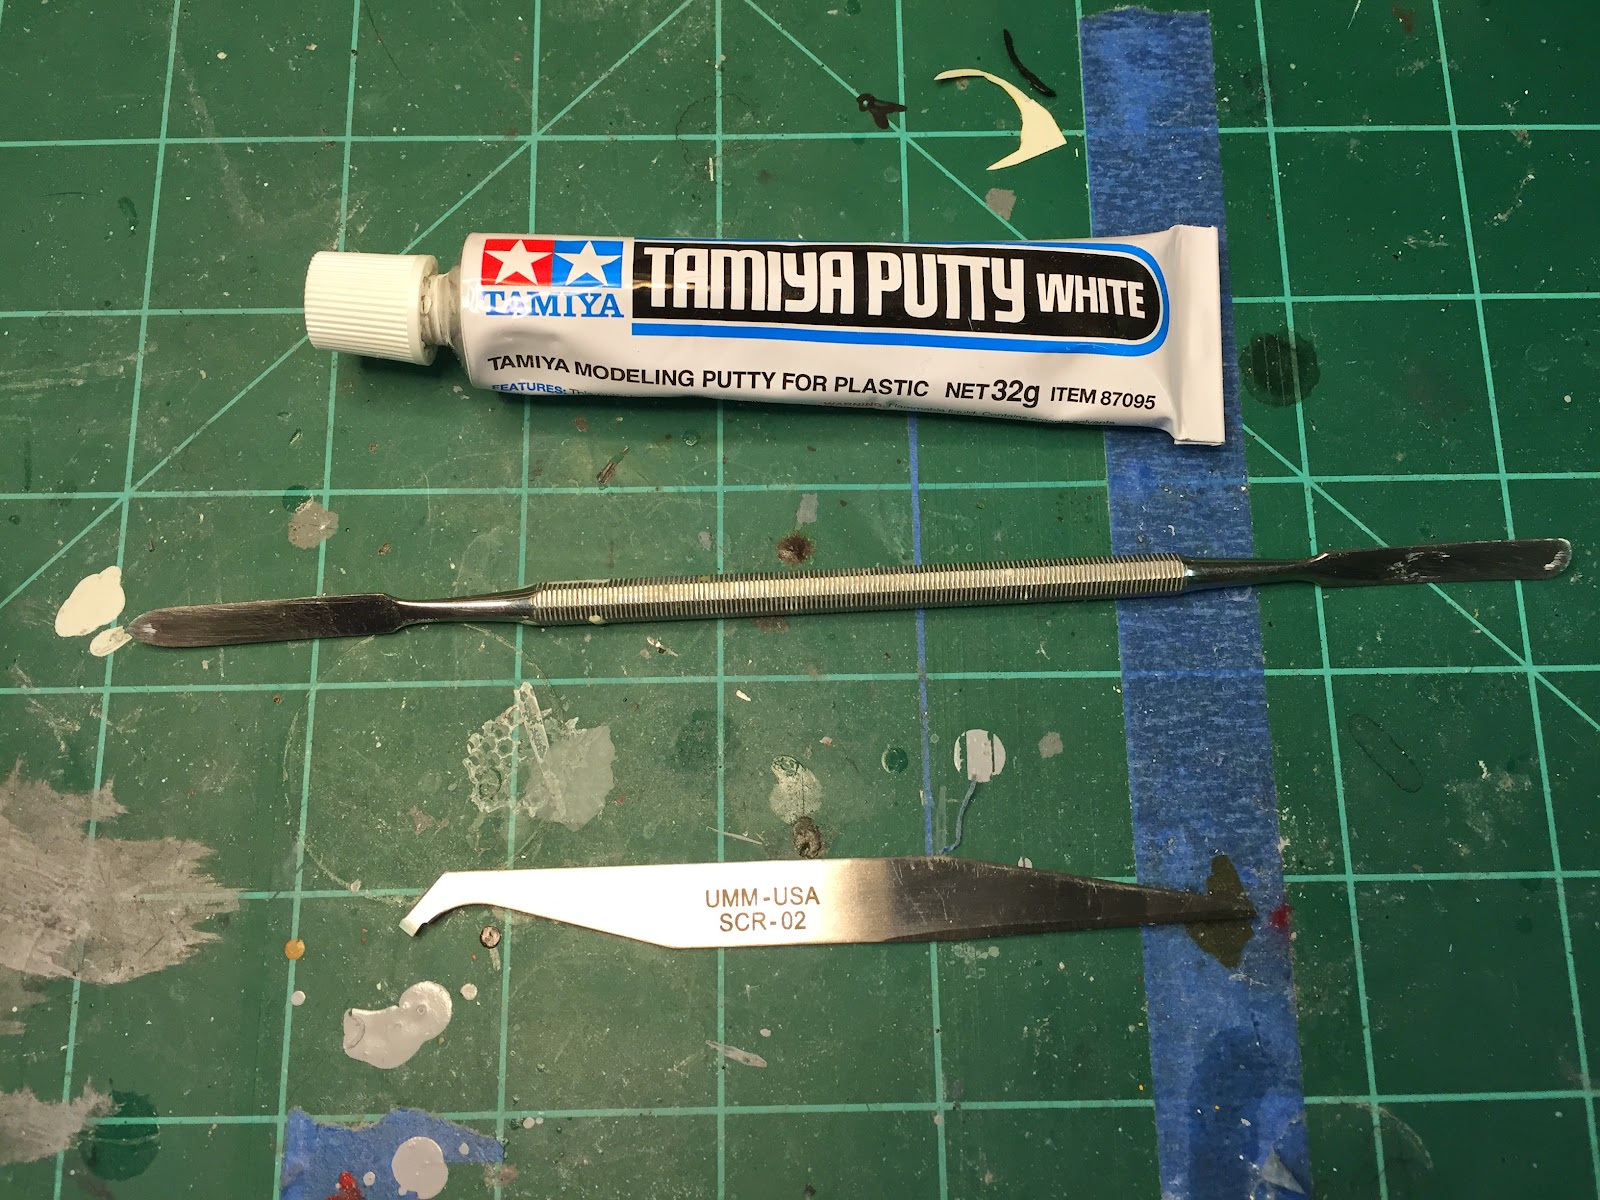
I'll also need putty to fill seams and gaps. For the most part I use Tamiya white putty. Cures fast, sands smooth. A bit on the pricey side but well worth it. I'll also need a putty spatula (that's the thing below the putty) and a rescriber from UMM-USA (bottom) to rescribe panel lines lost to sanding and filling - purely optional unless you're putting stuff in model competitions in which case is absolutely mandatory. Myself I don't really build for contests but I do like my models to look nice. CA glue can also be used to fill seams by the way, but I only use it for small gaps and seams.


How do I pick up those tiny parts to glue with? Not with my finger's I'm not! I use tweezers. I have two sets here: One self-clamping, and another pair of needle-nosed tweezers. Medical grade is the only way to go here.


MEK-based solvents tend to push the welded material outwards by the way, which can act as a gap filler (another reason MEK-based solvents are great since they'll automatically fill the majority of the gap with its own melted material, theoretically creating a perfect filled seam) and you may need to dispose of the excess. I tend to use this scraper to scrape the seams before sanding to finish out the surface.


And finally, you'll need a hobby knife/scalpel like an Exacto knife with a #11 blade.

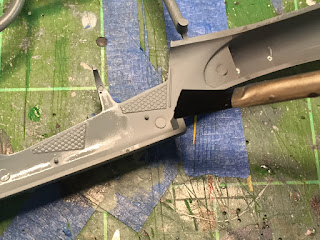
Speaking of Exacto knives, sometimes the parts have some flash on them (excess plastic). This is way easier to fix than a short shot piece since it's way easier to subtract than add when it comes to material. Like this guy here - just a big chunk of excess plastic on the side of the cockpit tub. Simply carefully trim away the excess.


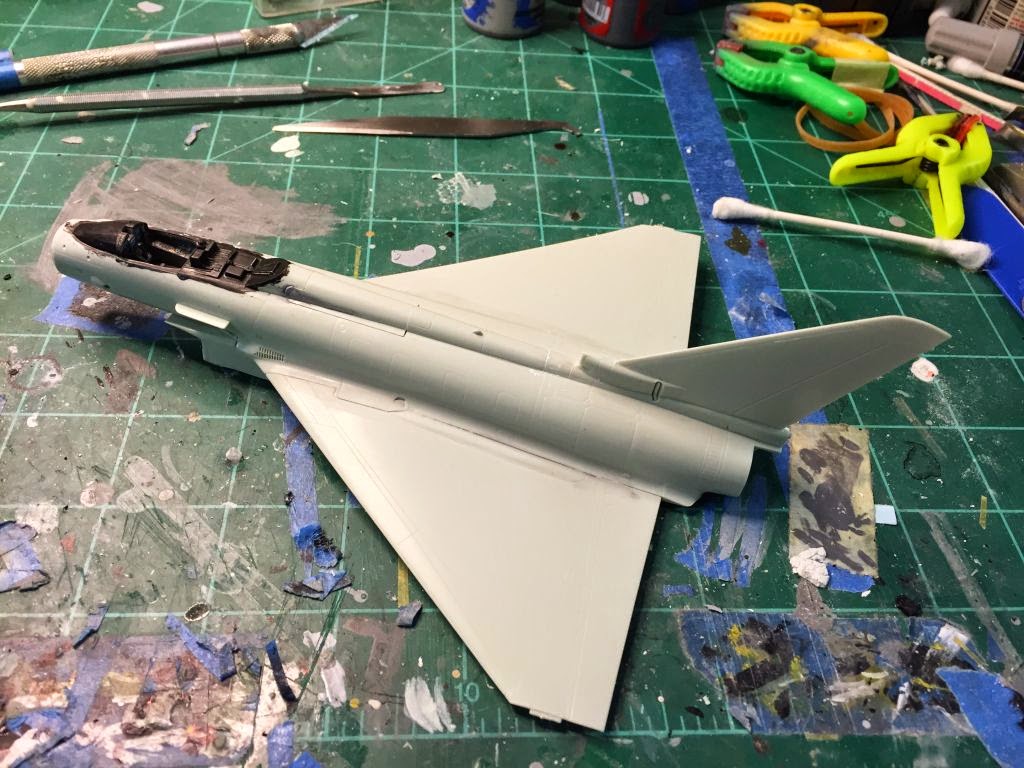
Once the prep work is done, the interior parts get an initial coat of paint. I did some color checking and the L-39s have a bluish gray color. I've found that Testor's Medium Gray matches fairly well, so that goes in the airbrush. The intake colors are wrong though - what Eduard wants you to do is paint the intake surfaces tan, which I thought odd. I did some research and found the intake trunking to be a dark gray. I used Tamiya's Neutral Gray, which interestingly enough turned out to be the exact shade of the plastic when the paint dried.


That was all done last night, and the paint was allowed to paint and cure overnight in preparation for a glosscoat. The glosscoat does several things: It seals the paints in, penetrates the base layer and hardens it, prepares a gloss surface for decals and also for ink/paint/oil washes. My glosscoat of choice is Pledge Floor Care Finish, formerly known as Pledge with Future (and known to modellers by its original name, Future). It's easy to clean up, washes off with Windex, and can also be used to dip clear parts after buffing to restore a shine, impart a glass-like clarity to canopies, and finally, use it to shine your linoneum! I keep two bottles on hand - one that's for pouring out only, to be used for airbrushing and dipping, and another bottle for brushing. More details on use later.

So with Future, I brushed all the areas I just painted. Note that Future will also darken flat paints slightly. The cockpit parts and intakes have been brushed, and will be left to dry throughout the day and will be ready for decals and weathering when I get home from work (I brushed the Future on this morning when I woke up). There are two ways to apply Future, by the way - brushing or airbrush. For brush, you want to apply it in quick, outward strokes with a very clean brush (a dirty brush will deposit lint and crud on the surface). In addition, after several strokes the surface application will start to dry and become more viscous, and result in streaks that may or may not level out over time depending on temperature. I know a master modeller who does this but I haven't had too much success with this. Maybe I'll try it again sometime. The other method is with an airbrush. Pour some in and spray it out at 15psi, and patiently apply it in layers. Layer it too much and it'll pool and cause drips, layer it too little and decals will not adhere properly and silver. The trick is to layer it just enough for the surface to look glossy. I do a combination of both. For interior surfaces, I brush it, and airbrush exterior surfaces.


That's it for now. More updates when I get home and start on the interior bits.

Tuesday, March 10, 2015

Eurofigher Typhoon F.2, RAF, Revell 1/72


This is a build that I had hoped to have completed in time for the Roscoe Turner contest, but due to some serious fit issues, it's probably not going to happen. The kit has some pretty poor fit and I get the sense that Revell cheaped out on this to get it out the door. Hopefully the 1/32 one I have fits better.

Anyway the Typhoon is my favorite European fighter at the moment. There's something about those gigantic delta wings and its stance that makes it look so cool. Not to mention the fact that it's armed to the gills with the most high-tech weaponry on earth.

Rather than following the instructions, I quickly identified potential problem areas, such as the 3-piece air intake assembly. Revell did partial intake trunking, as far as the eye goes, which is about 1" into the fuselage. Unfortunately the splitter plate fits in with a giant gap that required a few applications of putty and sanding to blend in.

I used Tamiya White Putty for this as it dries quickly and is very pliable, so I was able to use a putty spatula to really cram the putty into the gaps. This really needs to be a smooth transition so I used a damp q-tip with acetone to wipe the dried putty on the trunking, but to get the front area flat I had to sand the spot flat.

The cockpit came next, and this is where poor planning and not paying attention to the details can really mess you up. I planned on using the decals over the cockpit to save time on painting, but I realized too late that the decals do not match up with the parts! Apparently Revell's CAD and decal department didn't bother to meet up. It was too late to sand it off as I had already painted the tub and laid up some Future to prep it for decals. I ended having to cut the main panel decals up to fit over the screens and practically drowned them in Solvaset to get them to form over the shapes. Fortunately the mistake won't be as obvious once it's all closed up, but I know it's there and it bothers me to no end. The raised panel detail doesn't extend the entire side panels either, like in the real plane so it's just about a lose-lose situation. Ordinarily I'd avoid aftermarket photoetch but this may be the exception. There is also a throttle assembly and flight stick that goes in the tub. After a second coat of Future to seal in the decals, I brushed some Citadel Nuln Oil shading medium (more of an ink, really) and then sealed it in with some Citadel flat medium.

After closing up the cockpit tub in the fuselage, it was time to assemble the burner cans. Revell engineered this so you have to have the exhaust nozzles assembled at this point, which was ridiculous since there'd be no way to paint it properly after it's put together. I ended up temporarily attaching the exhaust nozzle to the back of the fuselage, then gluing the chambers to the inside of the fuselage (it's designed to attach primarily to the rims of the burner cans). I did not enjoy putting this together.


The lower fuselage/lower wing assembly and upper wings came on next and unfortunately, those did not go on well either. This is due to the complex lines the wings mount on. You'll notice the dogtooth on the wingroot, and part of the lower intake is also on the lower wing. I think Revell meant to do the join lines along panel lines, but in doing so they might have made it way too complex. A more elegant way to do it would be to completely exclude the lower intake from this in the first place. As I used liquid cement to put it together, time was of the essence so I didn't take any pictures. The wing root left a pretty huge gap and I ended up putting some liquid cement on the root, the running tape across to hold it up to the roots. I debated on whether I should have done that or just fill the gaps, as the Typhoon has a fair amount of anhedral in the wings, but once the tension was released the gaps looked better and there was still anhedral. I ended up putting some Mr Surfacer 1000 on the seam to even out the gaps.


I painted the cockpit coaming and deck with Testor's Aircraft Interior Black (which is really a very, very, dark gray), drybrushed it with some gray paint and sealed it with flat medium again. The canopy will come on once I get that seam polished out. The ejection seat is being put together at the moment (I missed some spots when I was spray-painting it) and I'll need to add some depth to the seat cushions and seatbelts so more on that later. Once that's added in the HUD will go on and the canopy will go on.

The airbrake does not fit for nuts. Initial fit shows that the panel stands proud. I mistakenly took off some material at the hinge, which I'm paying for now. For future reference, if you're modeling it with the brake closed, sand down the spine area, as well as a little bit of the interior of the airbrake, clean up the deck on which the brake goes on (it's badly molded and has a lot of soft detail - what the fudge, Revell?!), and thin out the "wings" of the airbrake. It's been a couple of days now and I'm starting to dislike this kit. To fix the hinge. I'll fill the gap with Mr Surface, smooth it out, then scribe in a newer, narrower panel line. Now that I think of it, I probably need to do the same for the rear of the airbrake.

As you can see on the bottom pics, it does not fit that wonderfully either. I'm still unsure why those rectangular holes are there on the wing, but they were supposed to be flush with the panel it goes on, but it must have shifted while the glue was curing. I suppose I could say this is due to bad modeling skill, but honestly, the engineering on this makes for a lousy fitting kit. I'm hoping I just got a bad kit and that the next Typhoon I build fits better. I ended up filling the gap with Tamiya Putty and sanding it smooth. I'm still debating if I want to rescribe that area.

At the end of the day, the wing seam has been smoothed out (the wing fit not sit flush with the fuselage despite my best efforts, probably due to the seams settling during the glue curing process), some panel lines rescribed with UMM's Scriber Tool No.2 (more on that later) and once the canopy is masked and attached, it'll be ready for paint. I am not enjoying this build but I refuse to set this aside as I've already gone too far to give up.


Flipping over, I realized I had forgotten to fill the lower-wing-to-upper-wing gap. The wings left a significant gap that was supposed to go along a panel line, but this was way too thick so I had no choice but to fill them. It didn't help that port and starboard navigation lights were right next to the gaps, so I couldn't simply sand the excess off. To start off, I put tape on the edges of gap. Note that one tape is blue, and the other yellow. The blue tape is regular old 3M painter's tape, cheap but effective. The yellow stuff is Tamiya's kabuki tape. It's more expensive, but holds a finer edge and a bit more flexible allowing for some masking along awkward raised surfaces (like our nav lights here).


Once the tape was on,the seams were filled with Mr Surfacer. You'll note that the tape allows a bit of edge, instead of covering the edge entirely. This would be to allow for some "overlap" so that when the filler is removed, it will sit flush with the wing's surfaced. Once the seam is filled, I will rescribe any lines lost to sanding and filling.


Well, that's it for now. I'll update again later as I work on it.

Tuesday, March 3, 2015

Grumman F-14D "Santa Felix," VF-31, Revell 1/72


Another Christmas build, I knew I had to build this as soon as I saw a photo of the jet. This kit has uses True Details resin seats with breaker "horns" made from strip styrene. The AN/AAQ-14 pod is from Hasegawa Weapons Set VII, and the GBU-10s and racks from Hasegawa Weapons Set VI.


 The kit is decent, but the Hasegawa and Fujimi kits are still the way to go. The panel lines on this are oddly thick, and strangely enough releases before and after this one did not have these thick lines. What I do like about the Revell kit is that it's simple, cheap and rugged.


Decals were originally from Superscale 72-815, but port side Felix image was misprinted. I scanned image, inverted starboard side Felix to replace port side and added the Santa hat (from photos of the tail I found off Google). The scheme was on around Christmas of 2003. This was also built for the ARC F-14 group build.

Source: U.S. Navy photo by Ensign Charles M. Abell. (RELEASED) Date 21 December 2002(2002-12-21)

Lockheed S-3 Viking "Santa Tracker," VS-35, Hasegawa 1/72


This is a limited edition boxing used with TwoBobs decals for VS-35. The boxing was for the G.W.Bush Mission Accomplished flight (which was also included in the TwoBobs sheet), but I opted for the Santa Tracker instead as it was more colorful, and also since it was for a Christmas-themed build.

 The kit is out of the box, and I experimented with replacing lost panel lines (this kit had raised panel lines) with pencil. The panel lines on the wings were done by preshading the panel lines, then lightly sanding off the top layer of paint after.


The refueling pod on the port wing was white metal, which made it awkward to mount due to the weight. I ended up removing the locator pins and drilling a new set of pins into the pylon and pod. I started this build in 2004, but set it aside for a while, completing it in Christmas of 2005, a particularly rough year for me. To cheer me up, my mom used it as a Christmas decoration that year, so this model holds a special significance for me.