
One of my favorite model aircraft brands is Airfix. I do believe I’ve built more Airfix kits than any other brand in my collection. I started off with an Airfix 1/72 Hawk T.1 my dad got me when I was six. Over the years, Airfix has risen and fallen, due to bad decisions and just general mismanagement. In the past five years, however, Airfix has made a spectacular comeback under its new parent company, Hornby (which also manufactures slot cars and model trains – so it knows its business). Looking at their recent releases, I’m delighted to say that they’re back – along with well-engineered, fun kits with an unbeatable price.

To start off I have a fairly recent build that I’m quite proud of – the Airfix MiG-15bis in 1/72, that I picked up for $10 and built in a week. This is one of their new molds. I’m not going to dwell into the shortcomings or inaccuracies of the kit as this blog is primarily about the process of building the model and enjoying the journey. To start off, we’ve got the cool CG box art that they’ve been doing – I miss the Roy Cross stuff but I have to say Airfix did a fantastic job with packaging, and their box art is simply exciting and cool!
I’ll be doing this cool scheme:

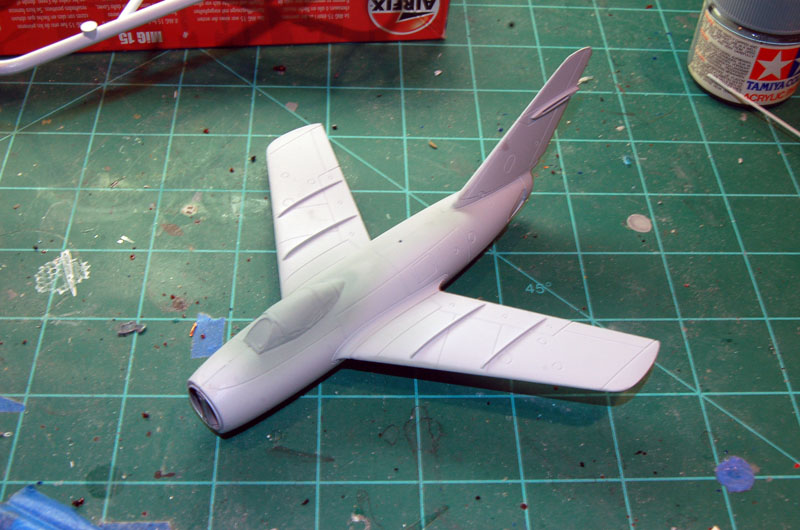
As with all models, painting started at the cockpit, which consists of a tub, stick, seat, instrument panel and decals. It’s not incredibly detailed but it’ll do the job.


Stick that into the fuselage halves, glue a few BBs under it as a noseweight and it’s on to the wings next. With fuselage halves I tend to use a “hotter” adhesive like MEK (methyl ethyl ketone) as it bonds the plastics at the molecular level, forming tougher joins. This is especially important for “seamless” areas such as fuselage halves as you don’t want the seam to pop later.


The ejection seat is not too bad – it’s a fair representation and the addition of seatbelts (made from tape) improves the look considerably.


Next comes painting. This is a little different from my norm as the
aim is to replicate a war-weary bird with minimal aesthetic maintenance,
ie paint repair. To start off I primed it to make sure I didn’t leave
any seams, then coated the entire model with Testor’s Model Master
Metalizer Polished Aluminum, then I polished it until it was slick.
Next came the panel line shading in black paint, then the first coat,
which was Tamiya Desert Yellow, and finally the stripes in Tamiya Dark
Green. After it had dried I sprayed the undersides with Tamiya Gloss
Black.


I did not apply a gloss coat at this point as I intended to scratch and scrape a lot of the paint off to simulate wear and tear. This was done with a combination of using a #11 blade, seam scraper and sanding sponge to applied to areas around the model, with an emphasis on maintenance panels and high-traffic areas.


After I was satisfied with the scuffing, I applied a gloss coat and waited for it to cure overnight. Decals went over the next day – only six decals – four roundels and a pair of aircraft numbers – no warning stencils. OSHA and maintenance inspectors would have had a heart attack.
Much later, after another gloss coat over the decals, and an oil wash to bring out the panel line detail, I proceeded to the “fiddly bit” stage where smaller items such as the drop tanks, landing gear, antenna, etc were completed, weathered and touched up. A final coat of matte spray and she was ready for final assembly.


And there we go. I’ve stuck this next to a Mig-31 I finished earlier
as a size comparison. This project took a week, which was one of the
fastest builds I’ve done in a while. To sweeten the pot this model won
first place at the 2011 1/72 Jet category at IPMS Kalamazoo (2nd place
went to another Airfix Mig-15). It was a great feeling as I had never
won first place before and to earn it at the club I first started out at
was a great homecoming of sorts.


No comments:
Post a Comment